> ## Documentation Index
> Fetch the complete documentation index at: https://signalschools.co.uk/docs/llms.txt
> Use this file to discover all available pages before exploring further.
# Setting Up Your School
> A step-by-step guide to configuring Signal for your school, including academic years, categories, locations, events, staff, policies, alerts, and MIS integration.
Setting up your school requires the **Owner** or **DSL** role. If you do not have one of these roles, ask your school's Signal administrator for help.
Signal provides a role-specific onboarding wizard on first login that guides you through the key setup steps. The detailed settings reference below covers everything the wizard introduces.
When your school first joins Signal, there are a few key areas to configure before your team can start recording safeguarding concerns. You do not need to complete everything at once — you can return to settings at any time to make changes.
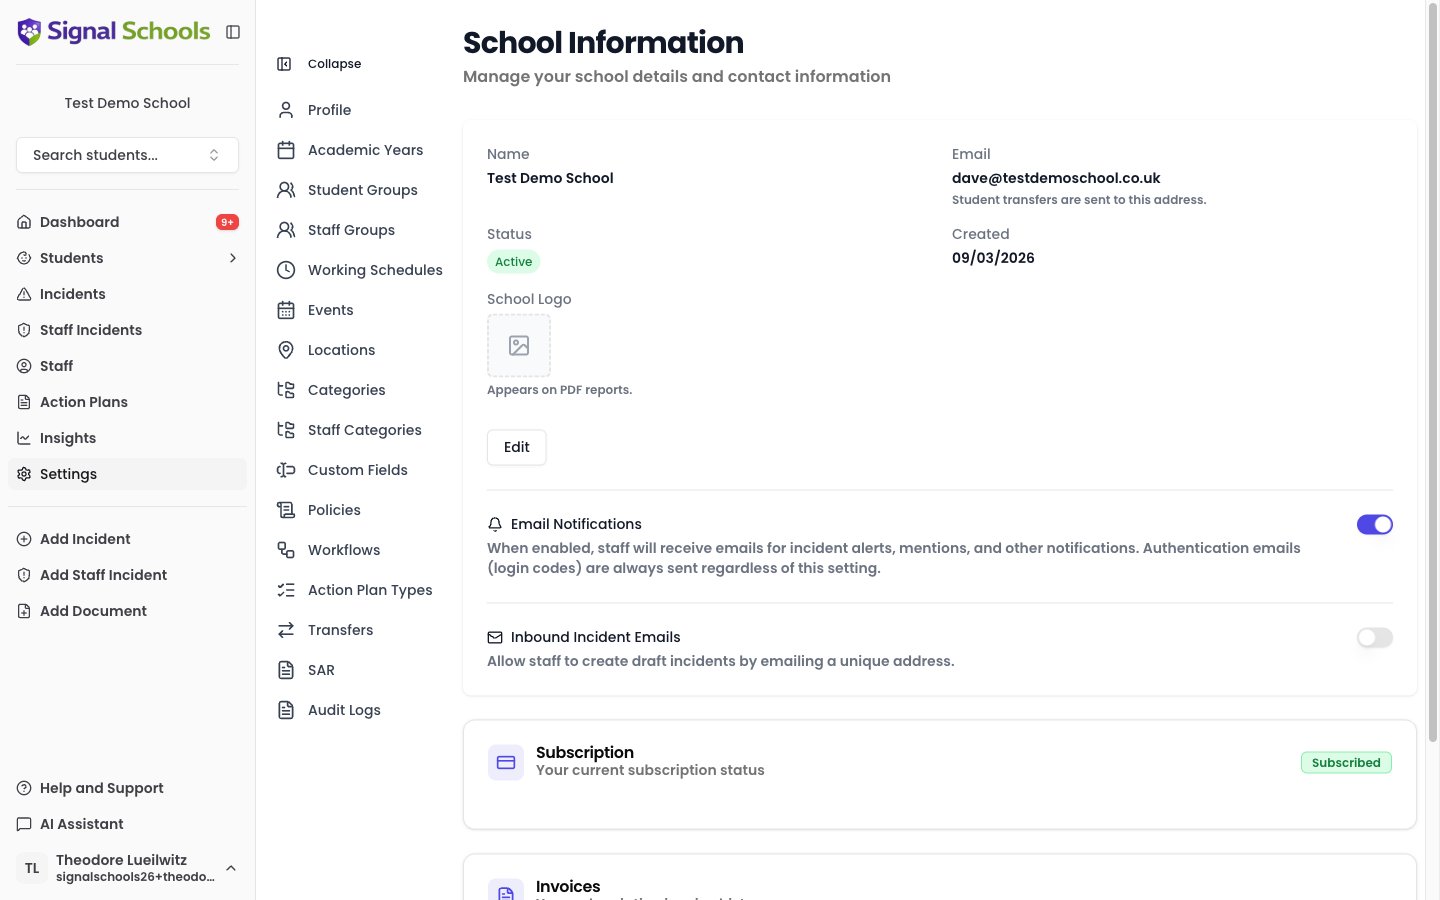 ## Setup checklist
### Set up year groups and classes
Year groups define your school's academic structure — Reception through to Year 13. Each year group contains one or more classes (such as 7A, 7B, or 8Red).
Students are assigned to a year group and class, and these are used for filtering throughout Signal — in incident lists, insights, alert rules, and student searches.
Go to **Settings > Academic Years** and use **Add Year** and **Add Class** to create your year groups and add classes to each one.
If you plan to connect your MIS (such as Arbor), year groups, classes, and students can be synced automatically. You may want to [set up your MIS integration](/docs/getting-started/mis-integration) first to save time.
### Add incident categories
Categories are how you classify safeguarding concerns. Common examples include Physical, Emotional, Neglect, Sexual, Online Safety, Attendance, and Behaviour.
Student incidents and staff incidents have separate category sets, so you can tailor each one independently.
Go to **Settings > Categories** to create your categories. For more detail, see [Setting up categories](/docs/incidents/setting-up-categories).
### Configure locations
Locations represent the places where incidents might occur — classrooms, playgrounds, corridors, off-site locations, and so on.
Go to **Settings > Locations** to add your school's locations. For more detail, see [Setting up locations](/docs/incidents/setting-up-locations).
### Record external agency involvement
External agency involvement — social services, police, CAMHS, CAFCASS, and others — is captured as **Events** rather than a separate agency list. Use the **External Agency Contact** event grouping and types to record when an outside organisation is involved with a student.
Go to **Settings > Events** to review and customise your event groupings and types. For more detail, see [Events overview](/docs/events/overview).
### Invite staff and assign roles
Add your colleagues to Signal and assign each person a role. Signal uses a hierarchical role system:
| Role | What they can do |
| --------------- | ---------------------------------------------------------------- |
| **Owner** | Full access to everything, including account management |
| **DSL** | Full safeguarding access, including staff incidents and settings |
| **Deputy DSL** | Same access as DSL |
| **Admin** | Can manage settings but has limited incident access |
| **Contributor** | Read-only access to student incidents |
| **Member** | Appears in the system but cannot log in |
Go to **Staff** in the sidebar to invite team members and assign roles. For more detail, see [Managing staff](/docs/staff/managing-staff).
### Upload safeguarding policies
Upload your school's safeguarding policy documents so that Signal's AI can automatically match relevant policies to incidents.
Go to **Settings > Policies** to upload your documents. For more detail, see [Adding policies](/docs/policies/adding-policies).
### Set up class and year group alerts
Before building workflows by hand, set up your everyday alerting. Go to **Settings > Workflows** — if you have not configured any alerting yet, you are offered a **Set up class and year group alerts** panel.
The wizard asks who should hear about incidents and creates the workflows for you. Most schools choose class staff for their own class, plus a head of year who sees everything for their year group.
This relies on each class having a Staff Group named after it (such as "7A Staff"). The wizard tells you how many of your classes have one before you commit. For more detail, see [Alerts](/docs/workflows/alerts).
If you are connecting your MIS, do that first — your Staff Groups are created automatically, so the wizard has more to work with.
### Set up workflows
Workflows automatically take action when incidents matching certain criteria are logged — alerting staff, emailing parents, or restricting visibility. For example, you might set up a workflow to alert all DSLs whenever a Physical incident is recorded for a student in the Children in Care group.
Go to **Settings > Workflows** to create your first workflow. For more detail, see [Workflows](/docs/workflows/overview).
### Set up MIS integration (optional)
If your school uses Arbor, you can connect it to Signal to automatically sync student, staff, contact, and attendance data. This saves significant manual data entry.
Go to **Settings > Integrations** to connect your MIS. For a detailed walkthrough, see [MIS Integration](/docs/getting-started/mis-integration).
## Tips for getting started quickly
You do not need to have everything perfect before your team starts using Signal. Begin with the essentials — categories, a few locations, and your staff — then refine as you go.
* **Start with categories and staff.** These are the minimum requirements for recording incidents. You can add locations, events, and policies later.
* **Connect your MIS early.** If you use Arbor, setting up the integration first will automatically populate your year groups, classes, students, and staff.
* **Create a few alert rules.** Even basic rules (such as alerting DSLs on all incidents) ensure nothing is missed from day one.
* **Upload your core policies.** Start with your main safeguarding policy and child protection policy. You can add more over time.
* **Invite a small group first.** Consider onboarding your safeguarding team before rolling out to all staff, so you can answer questions and refine your setup.
## Setup checklist
### Set up year groups and classes
Year groups define your school's academic structure — Reception through to Year 13. Each year group contains one or more classes (such as 7A, 7B, or 8Red).
Students are assigned to a year group and class, and these are used for filtering throughout Signal — in incident lists, insights, alert rules, and student searches.
Go to **Settings > Academic Years** and use **Add Year** and **Add Class** to create your year groups and add classes to each one.
If you plan to connect your MIS (such as Arbor), year groups, classes, and students can be synced automatically. You may want to [set up your MIS integration](/docs/getting-started/mis-integration) first to save time.
### Add incident categories
Categories are how you classify safeguarding concerns. Common examples include Physical, Emotional, Neglect, Sexual, Online Safety, Attendance, and Behaviour.
Student incidents and staff incidents have separate category sets, so you can tailor each one independently.
Go to **Settings > Categories** to create your categories. For more detail, see [Setting up categories](/docs/incidents/setting-up-categories).
### Configure locations
Locations represent the places where incidents might occur — classrooms, playgrounds, corridors, off-site locations, and so on.
Go to **Settings > Locations** to add your school's locations. For more detail, see [Setting up locations](/docs/incidents/setting-up-locations).
### Record external agency involvement
External agency involvement — social services, police, CAMHS, CAFCASS, and others — is captured as **Events** rather than a separate agency list. Use the **External Agency Contact** event grouping and types to record when an outside organisation is involved with a student.
Go to **Settings > Events** to review and customise your event groupings and types. For more detail, see [Events overview](/docs/events/overview).
### Invite staff and assign roles
Add your colleagues to Signal and assign each person a role. Signal uses a hierarchical role system:
| Role | What they can do |
| --------------- | ---------------------------------------------------------------- |
| **Owner** | Full access to everything, including account management |
| **DSL** | Full safeguarding access, including staff incidents and settings |
| **Deputy DSL** | Same access as DSL |
| **Admin** | Can manage settings but has limited incident access |
| **Contributor** | Read-only access to student incidents |
| **Member** | Appears in the system but cannot log in |
Go to **Staff** in the sidebar to invite team members and assign roles. For more detail, see [Managing staff](/docs/staff/managing-staff).
### Upload safeguarding policies
Upload your school's safeguarding policy documents so that Signal's AI can automatically match relevant policies to incidents.
Go to **Settings > Policies** to upload your documents. For more detail, see [Adding policies](/docs/policies/adding-policies).
### Set up class and year group alerts
Before building workflows by hand, set up your everyday alerting. Go to **Settings > Workflows** — if you have not configured any alerting yet, you are offered a **Set up class and year group alerts** panel.
The wizard asks who should hear about incidents and creates the workflows for you. Most schools choose class staff for their own class, plus a head of year who sees everything for their year group.
This relies on each class having a Staff Group named after it (such as "7A Staff"). The wizard tells you how many of your classes have one before you commit. For more detail, see [Alerts](/docs/workflows/alerts).
If you are connecting your MIS, do that first — your Staff Groups are created automatically, so the wizard has more to work with.
### Set up workflows
Workflows automatically take action when incidents matching certain criteria are logged — alerting staff, emailing parents, or restricting visibility. For example, you might set up a workflow to alert all DSLs whenever a Physical incident is recorded for a student in the Children in Care group.
Go to **Settings > Workflows** to create your first workflow. For more detail, see [Workflows](/docs/workflows/overview).
### Set up MIS integration (optional)
If your school uses Arbor, you can connect it to Signal to automatically sync student, staff, contact, and attendance data. This saves significant manual data entry.
Go to **Settings > Integrations** to connect your MIS. For a detailed walkthrough, see [MIS Integration](/docs/getting-started/mis-integration).
## Tips for getting started quickly
You do not need to have everything perfect before your team starts using Signal. Begin with the essentials — categories, a few locations, and your staff — then refine as you go.
* **Start with categories and staff.** These are the minimum requirements for recording incidents. You can add locations, events, and policies later.
* **Connect your MIS early.** If you use Arbor, setting up the integration first will automatically populate your year groups, classes, students, and staff.
* **Create a few alert rules.** Even basic rules (such as alerting DSLs on all incidents) ensure nothing is missed from day one.
* **Upload your core policies.** Start with your main safeguarding policy and child protection policy. You can add more over time.
* **Invite a small group first.** Consider onboarding your safeguarding team before rolling out to all staff, so you can answer questions and refine your setup.