> ## Documentation Index
> Fetch the complete documentation index at: https://signalschools.co.uk/docs/llms.txt
> Use this file to discover all available pages before exploring further.
# Alerts
> How workflow-triggered alerts notify staff about safeguarding concerns. Learn where alerts appear, how email delivery works, and how to manage your alerts.
The **Alert Users** and **Alert DSLs** actions on a [workflow](/docs/workflows/overview) send notifications to staff when an incident matches the workflow's trigger criteria. This keeps the right people informed without anyone needing to manually check for new incidents.
An alert is not the same as an [@mention](/docs/incidents/collaboration). An alert means *this may be something you should know about* — it fires from a rule, usually to several people at once, and is dismissed once read. A mention means *a colleague is asking you specifically* — for what you saw, a follow-up, or a decision — and stays unread until opened.
Worth making explicit when training staff, so alerts are not mistaken for tasks assigned to them, and mentions are not left sitting as background noise.
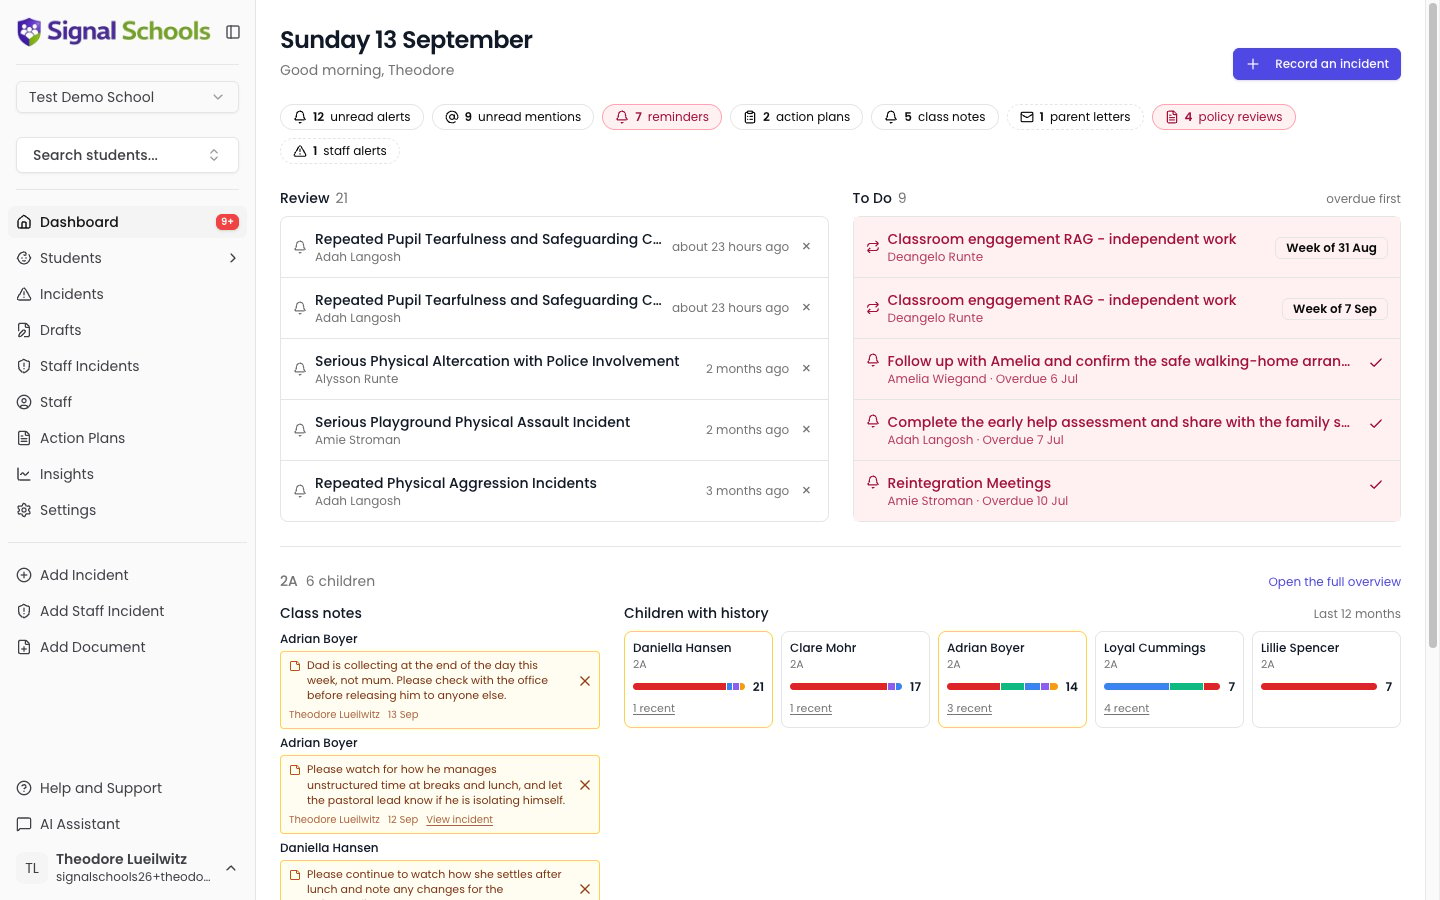 ## How alerts are generated
When an incident is created and matches a workflow's trigger, an alert action:
1. Identifies the recipients — the automatic class and year group options, **Staff Groups**, and **Individual Users** on an **Alert Users** action, or all DSL-level staff on an **Alert DSLs** action
2. Creates an alert for each recipient
3. The alert appears immediately on the recipient's dashboard
4. An email notification is sent (subject to [working schedules](/docs/workflows/working-schedules))
## Configuring alert actions
The **Alert Users** action lets you choose exactly who is notified:
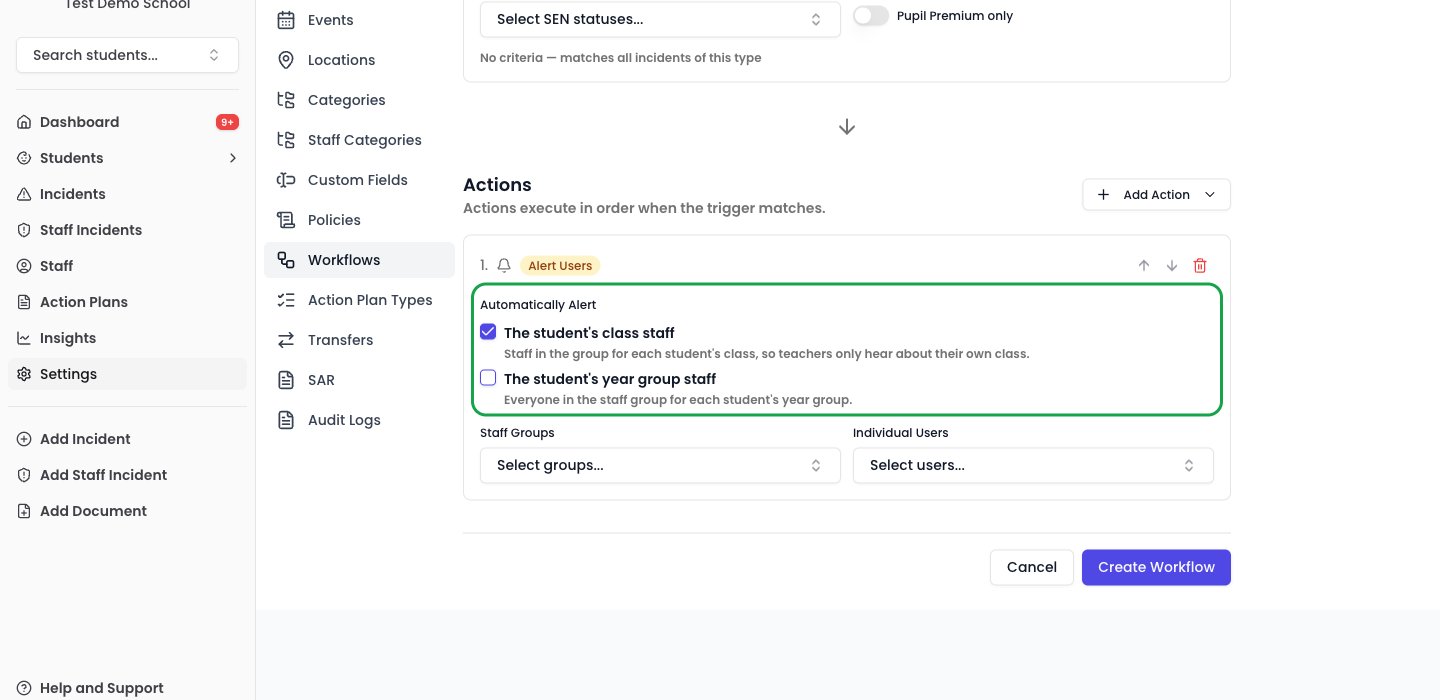
* **The student's class staff** — alert the staff for whichever class the student is in
* **The student's year group staff** — alert the staff for whichever year group the student is in
* **Staff Groups** — alert everyone in one or more Staff Groups
* **Individual Users** — select individual staff members to alert
You can combine these. A single workflow might alert the student's class staff, plus one named pastoral lead.
The **Alert DSLs** action needs no configuration — it automatically alerts all staff with the Owner, DSL, or Deputy DSL role.
Staff whose only role is **Reporter** do not appear in the **Individual Users** picker. Reporters see only the incidents they recorded or were @mentioned in, so an alert about anything else would lead them to a record they cannot open. To bring a Reporter into a specific case, @mention them in it instead — see [Roles and permissions](/docs/staff/overview).
You can add both actions to the same workflow. For example, use **Alert Users** to notify a specific pastoral lead and **Alert DSLs** so all senior safeguarding staff are notified too.
## How alerts are generated
When an incident is created and matches a workflow's trigger, an alert action:
1. Identifies the recipients — the automatic class and year group options, **Staff Groups**, and **Individual Users** on an **Alert Users** action, or all DSL-level staff on an **Alert DSLs** action
2. Creates an alert for each recipient
3. The alert appears immediately on the recipient's dashboard
4. An email notification is sent (subject to [working schedules](/docs/workflows/working-schedules))
## Configuring alert actions
The **Alert Users** action lets you choose exactly who is notified:
* **The student's class staff** — alert the staff for whichever class the student is in
* **The student's year group staff** — alert the staff for whichever year group the student is in
* **Staff Groups** — alert everyone in one or more Staff Groups
* **Individual Users** — select individual staff members to alert
You can combine these. A single workflow might alert the student's class staff, plus one named pastoral lead.
The **Alert DSLs** action needs no configuration — it automatically alerts all staff with the Owner, DSL, or Deputy DSL role.
Staff whose only role is **Reporter** do not appear in the **Individual Users** picker. Reporters see only the incidents they recorded or were @mentioned in, so an alert about anything else would lead them to a record they cannot open. To bring a Reporter into a specific case, @mention them in it instead — see [Roles and permissions](/docs/staff/overview).
You can add both actions to the same workflow. For example, use **Alert Users** to notify a specific pastoral lead and **Alert DSLs** so all senior safeguarding staff are notified too.
 ## Alerting a student's own class or year group
Most schools want teachers to hear about incidents for **their own class**, and only a few people — such as a head of year — to see everything for a whole year group.
Rather than building a separate workflow for every class, tick **The student's class staff** on an **Alert Users** action. When an incident is logged, Signal looks at which class the student is in and alerts that class's staff. One workflow covers every class in the school.
**The student's year group staff** works the same way at year group level.
These options apply to student incidents only. Staff incidents have no student, so there is no class or year group to work out — the tick boxes are hidden on staff incident workflows.
### How Signal finds the right staff
Signal matches the student's class or year group to the **Staff Group named after it**:
| Student is in | Signal alerts the Staff Group named |
| ------------- | ----------------------------------- |
| Class 7A | **7A Staff** |
| Class RB | **RB Staff** |
| Year 7 | **Year 7 Staff** |
The name must match exactly, with **Staff** on the end. If you connect your MIS, these groups are usually created for you. Otherwise you can create them yourself — see [Staff Groups](/docs/staff/staff-groups).
If a class has no matching Staff Group, no class staff are alerted for students in that class. Everyone else on the workflow — DSLs, named individuals, other Staff Groups — is still alerted as normal.
### Family incidents also reach siblings' staff
When an incident is marked as a [family incident](/docs/incidents/recording-incidents#confirm-whether-it-is-a-family-incident), these two options reach further. As well as the pupil's own class and year staff, Signal alerts the class and year staff of **every sibling at your school** — because a concern about the household matters just as much to the staff looking after a brother or sister in another year group.
This applies only to the two dynamic tick boxes. A workflow that alerts named individuals or specific Staff Groups is unaffected — those recipients are exactly who you chose.
Student restrictions are still respected: a staff member restricted from a sibling is not alerted about them.
Check your coverage under **Settings > Staff Groups**. Every class in your school should have a matching group ending in "Staff", with the right teachers in it.
### Why this keeps working
Because Signal works out the recipients each time an incident is logged, you do not need to revisit the workflow when things change. Students moving between classes, new teachers joining, or staff changing class are all picked up automatically.
The one thing to keep right is Staff Group membership. Groups synced from your MIS update themselves; groups you created manually need updating by hand when staff change.
## Setting up class and year group alerts quickly
Setting up alerts requires you to be a **Deputy DSL** or above.
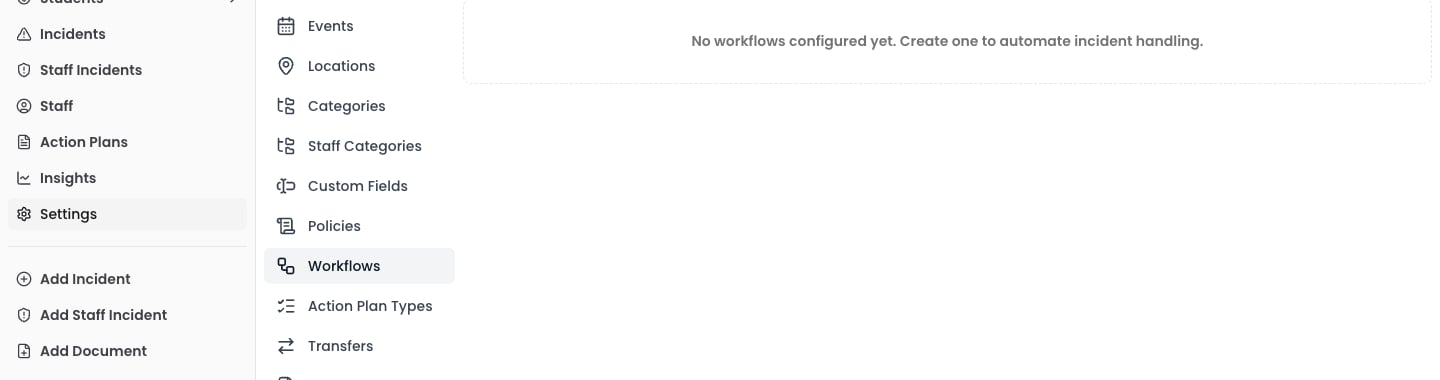
If your school has not set up any alerting yet, **Settings > Workflows** offers a **Set up class and year group alerts** panel. The wizard creates the workflows for you, so you do not have to build them by hand.
The panel disappears once you have a workflow that alerts class or year group staff — other workflows do not hide it. You can still create and edit alert workflows normally at any time.
The panel is never shown during a demo, because setting up class and year group alerts requires a subscription.
## Alerting a student's own class or year group
Most schools want teachers to hear about incidents for **their own class**, and only a few people — such as a head of year — to see everything for a whole year group.
Rather than building a separate workflow for every class, tick **The student's class staff** on an **Alert Users** action. When an incident is logged, Signal looks at which class the student is in and alerts that class's staff. One workflow covers every class in the school.
**The student's year group staff** works the same way at year group level.
These options apply to student incidents only. Staff incidents have no student, so there is no class or year group to work out — the tick boxes are hidden on staff incident workflows.
### How Signal finds the right staff
Signal matches the student's class or year group to the **Staff Group named after it**:
| Student is in | Signal alerts the Staff Group named |
| ------------- | ----------------------------------- |
| Class 7A | **7A Staff** |
| Class RB | **RB Staff** |
| Year 7 | **Year 7 Staff** |
The name must match exactly, with **Staff** on the end. If you connect your MIS, these groups are usually created for you. Otherwise you can create them yourself — see [Staff Groups](/docs/staff/staff-groups).
If a class has no matching Staff Group, no class staff are alerted for students in that class. Everyone else on the workflow — DSLs, named individuals, other Staff Groups — is still alerted as normal.
### Family incidents also reach siblings' staff
When an incident is marked as a [family incident](/docs/incidents/recording-incidents#confirm-whether-it-is-a-family-incident), these two options reach further. As well as the pupil's own class and year staff, Signal alerts the class and year staff of **every sibling at your school** — because a concern about the household matters just as much to the staff looking after a brother or sister in another year group.
This applies only to the two dynamic tick boxes. A workflow that alerts named individuals or specific Staff Groups is unaffected — those recipients are exactly who you chose.
Student restrictions are still respected: a staff member restricted from a sibling is not alerted about them.
Check your coverage under **Settings > Staff Groups**. Every class in your school should have a matching group ending in "Staff", with the right teachers in it.
### Why this keeps working
Because Signal works out the recipients each time an incident is logged, you do not need to revisit the workflow when things change. Students moving between classes, new teachers joining, or staff changing class are all picked up automatically.
The one thing to keep right is Staff Group membership. Groups synced from your MIS update themselves; groups you created manually need updating by hand when staff change.
## Setting up class and year group alerts quickly
Setting up alerts requires you to be a **Deputy DSL** or above.
If your school has not set up any alerting yet, **Settings > Workflows** offers a **Set up class and year group alerts** panel. The wizard creates the workflows for you, so you do not have to build them by hand.
The panel disappears once you have a workflow that alerts class or year group staff — other workflows do not hide it. You can still create and edit alert workflows normally at any time.
The panel is never shown during a demo, because setting up class and year group alerts requires a subscription.
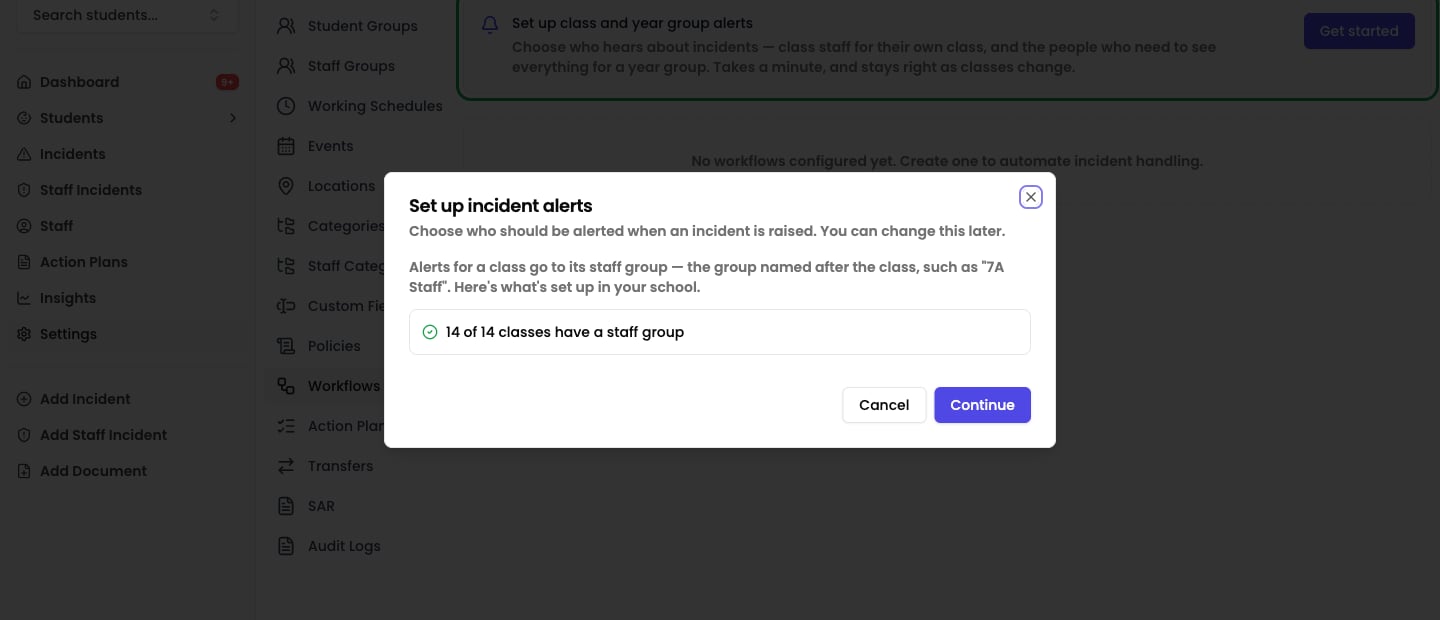
 The wizard opens by telling you how many of your classes have a Staff Group — for example, "12 of 14 classes have a staff group". Any classes without one are listed by name.
If classes are missing, you can carry on and add their groups later, but no class staff will be alerted for those students in the meantime.
The wizard opens by telling you how many of your classes have a Staff Group — for example, "12 of 14 classes have a staff group". Any classes without one are listed by name.
If classes are missing, you can carry on and add their groups later, but no class staff will be alerted for those students in the meantime.
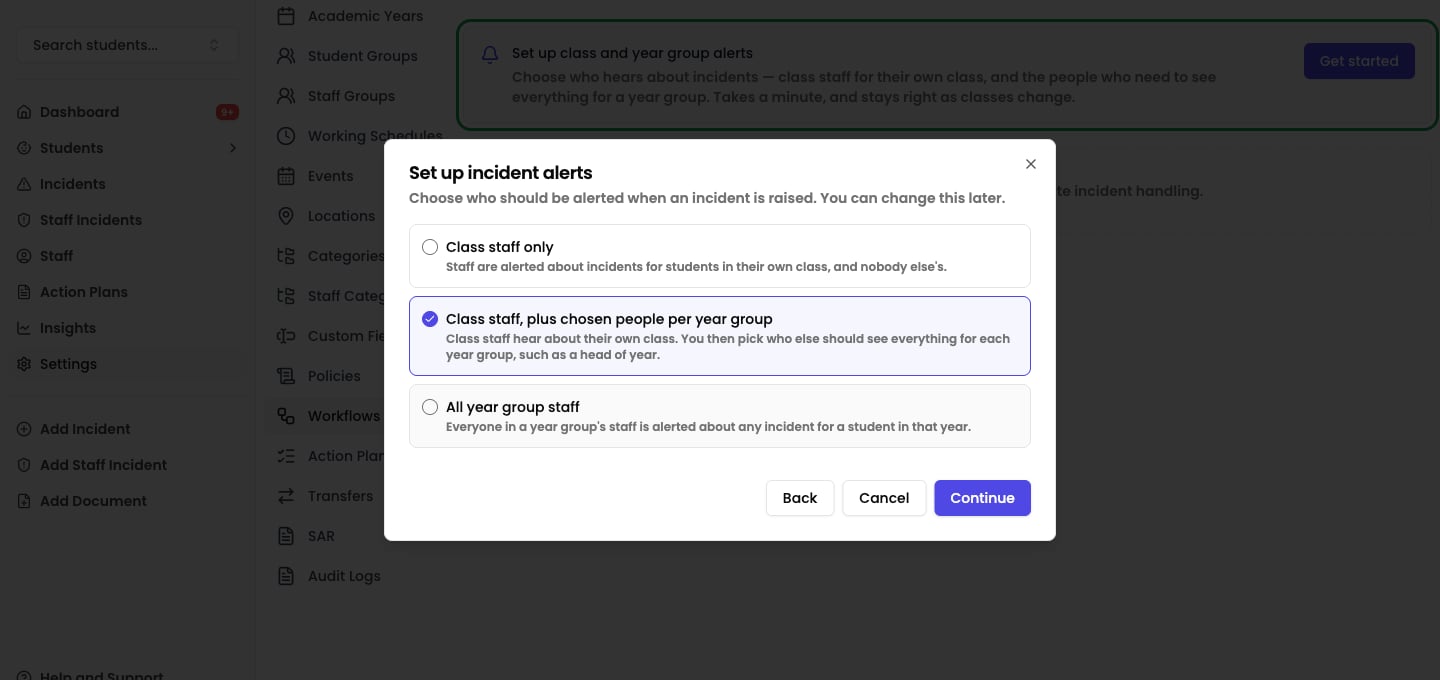
 Pick the option that matches how your school works:
* **Class staff only** — staff hear about incidents for students in their own class, and nobody else's.
* **Class staff, plus chosen people per year group** — class staff hear about their own class, and you choose who else sees everything for each year group.
* **All year group staff** — everyone in a year group's staff is alerted about any incident for a student in that year.
If you picked the second option, you are shown each year group with a staff picker. Select the people who should see every incident in that year — typically the head of year.
Leave a year group blank if nobody needs year-wide alerts. Class staff are still alerted for those students.
Click **Set up alerts**. Signal creates the workflows and confirms how many were created.
Pick the option that matches how your school works:
* **Class staff only** — staff hear about incidents for students in their own class, and nobody else's.
* **Class staff, plus chosen people per year group** — class staff hear about their own class, and you choose who else sees everything for each year group.
* **All year group staff** — everyone in a year group's staff is alerted about any incident for a student in that year.
If you picked the second option, you are shown each year group with a staff picker. Select the people who should see every incident in that year — typically the head of year.
Leave a year group blank if nobody needs year-wide alerts. Class staff are still alerted for those students.
Click **Set up alerts**. Signal creates the workflows and confirms how many were created.
 The workflows the wizard creates are ordinary workflows. You can open any of them from **Settings > Workflows** to rename them, add more recipients, or narrow them to particular categories.
Most primary and secondary schools want the second option — class teachers hearing about their own class, and a head of year seeing the whole year group.
## Where alerts appear
Alerts appear in two places:
* **Dashboard** — the **My Alerts** section on your dashboard shows all alerts you have received. Staff with the Owner, DSL, or Deputy DSL role also see a **Staff Alerts** section for alerts related to staff incidents.
* **Email** — if your school has email notifications enabled, you receive an email for each alert. Email delivery respects your [working schedule](/docs/workflows/working-schedules), so you are not disturbed outside school hours.
## Managing alerts
When you see an alert on your dashboard, you can:
* **View the incident** — click on the alert to open the related incident and review the details.
* **Dismiss** — remove the alert from your dashboard once no further action is needed.
## Email delivery and working schedules
Alert emails are delivered immediately unless the recipient has a [working schedule](/docs/workflows/working-schedules) configured. If an alert is generated outside the staff member's working hours, the email is held and delivered at the start of their next working period.
Dashboard alerts always appear immediately, regardless of working schedules.
**Urgent concerns are never held back.** If the incident carries a category your school has marked as **high priority**, its emails send straight away at any hour, and arrive marked **\[HIGH PRIORITY]** in the subject line. See [Working schedules](/docs/workflows/working-schedules#urgent-concerns-always-send-immediately).
Set up [working schedules](/docs/workflows/working-schedules) to prevent staff from receiving safeguarding emails during evenings, weekends, or school holidays.
The workflows the wizard creates are ordinary workflows. You can open any of them from **Settings > Workflows** to rename them, add more recipients, or narrow them to particular categories.
Most primary and secondary schools want the second option — class teachers hearing about their own class, and a head of year seeing the whole year group.
## Where alerts appear
Alerts appear in two places:
* **Dashboard** — the **My Alerts** section on your dashboard shows all alerts you have received. Staff with the Owner, DSL, or Deputy DSL role also see a **Staff Alerts** section for alerts related to staff incidents.
* **Email** — if your school has email notifications enabled, you receive an email for each alert. Email delivery respects your [working schedule](/docs/workflows/working-schedules), so you are not disturbed outside school hours.
## Managing alerts
When you see an alert on your dashboard, you can:
* **View the incident** — click on the alert to open the related incident and review the details.
* **Dismiss** — remove the alert from your dashboard once no further action is needed.
## Email delivery and working schedules
Alert emails are delivered immediately unless the recipient has a [working schedule](/docs/workflows/working-schedules) configured. If an alert is generated outside the staff member's working hours, the email is held and delivered at the start of their next working period.
Dashboard alerts always appear immediately, regardless of working schedules.
**Urgent concerns are never held back.** If the incident carries a category your school has marked as **high priority**, its emails send straight away at any hour, and arrive marked **\[HIGH PRIORITY]** in the subject line. See [Working schedules](/docs/workflows/working-schedules#urgent-concerns-always-send-immediately).
Set up [working schedules](/docs/workflows/working-schedules) to prevent staff from receiving safeguarding emails during evenings, weekends, or school holidays.