Creating a new action plan
1
Navigate to Action Plans
Open Action Plans from the sidebar and click Add Plan.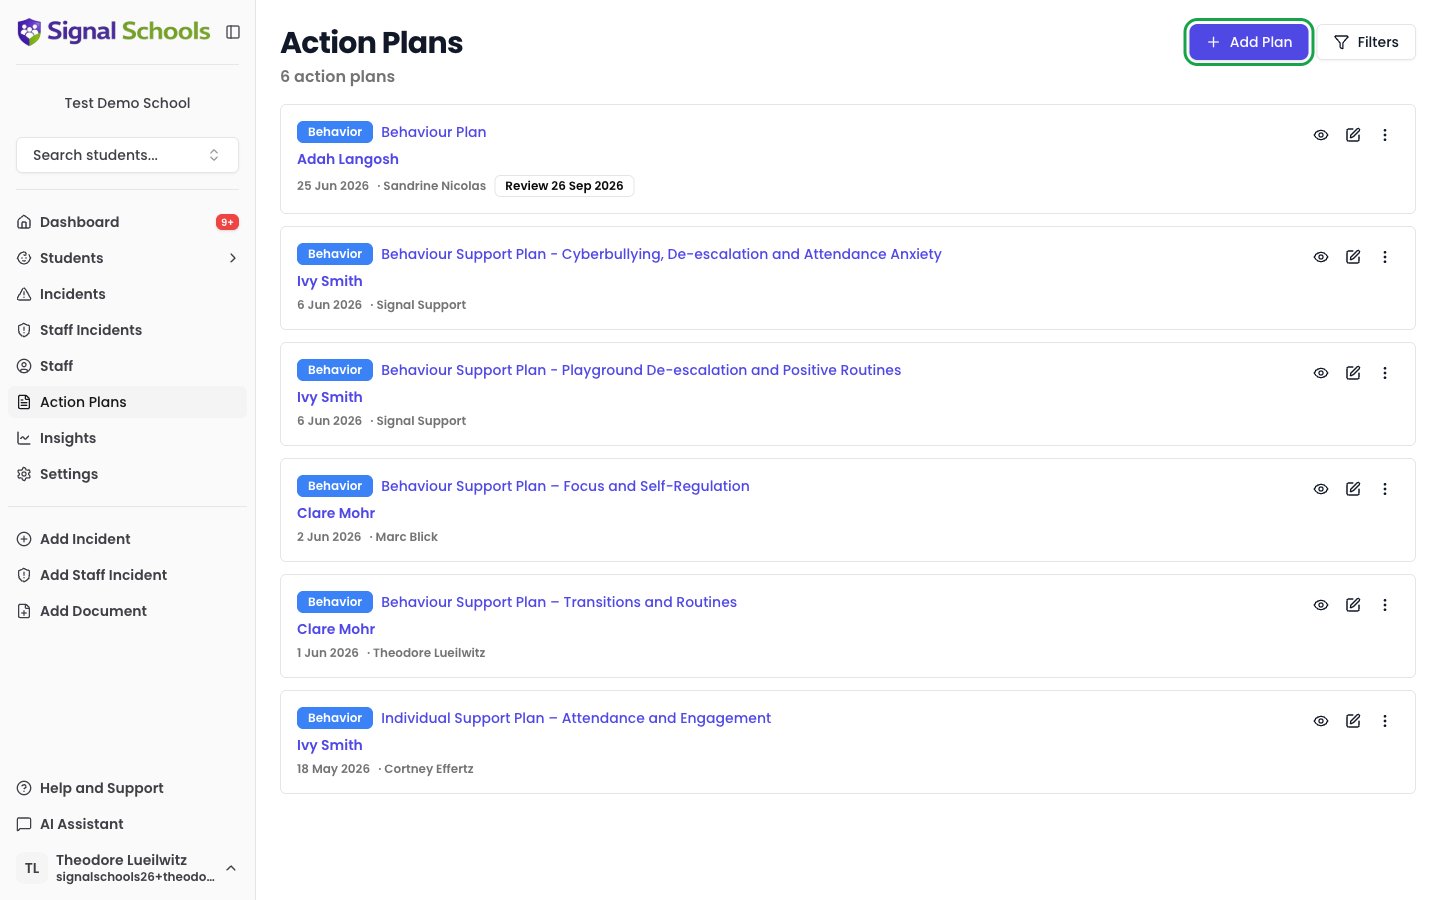
2
Select the action plan type
Choose the type of plan you are creating — for example, Behavioural, Medical, or Learning Support. Types are defined by your school in settings and describe the nature of the intervention.
3
Choose the student or students
Search for and select the student this plan is for.To write a joint plan for two or more children working through something together, search again and add each of them. A note appears once you add a second student, reminding you that staff restricted from any student on the plan will not see the plan at all.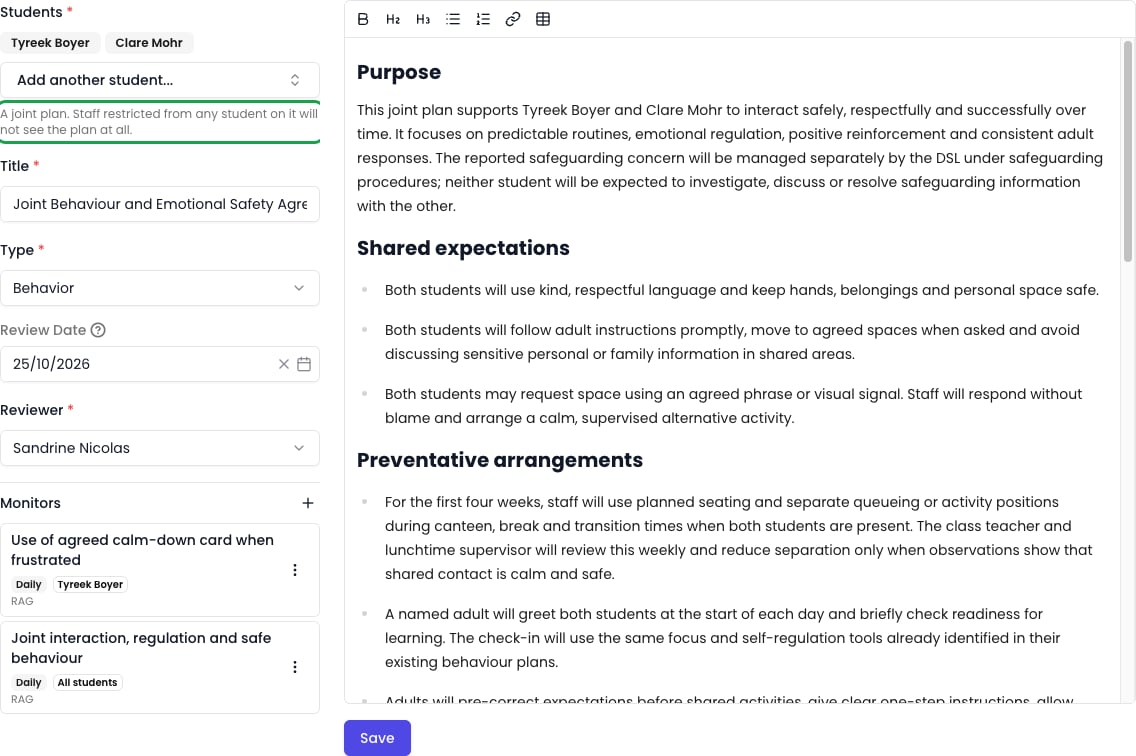
4
Write the plan content
Describe the intervention in the content area. Include the objectives, the actions to be taken, who is responsible, and what success looks like.Alternatively, you can use AI-assisted generation to create a draft. Signal’s AI drafts plan content based on the selected type and any linked incidents. You review and edit the generated content before saving — the AI provides a starting point, not a finished product.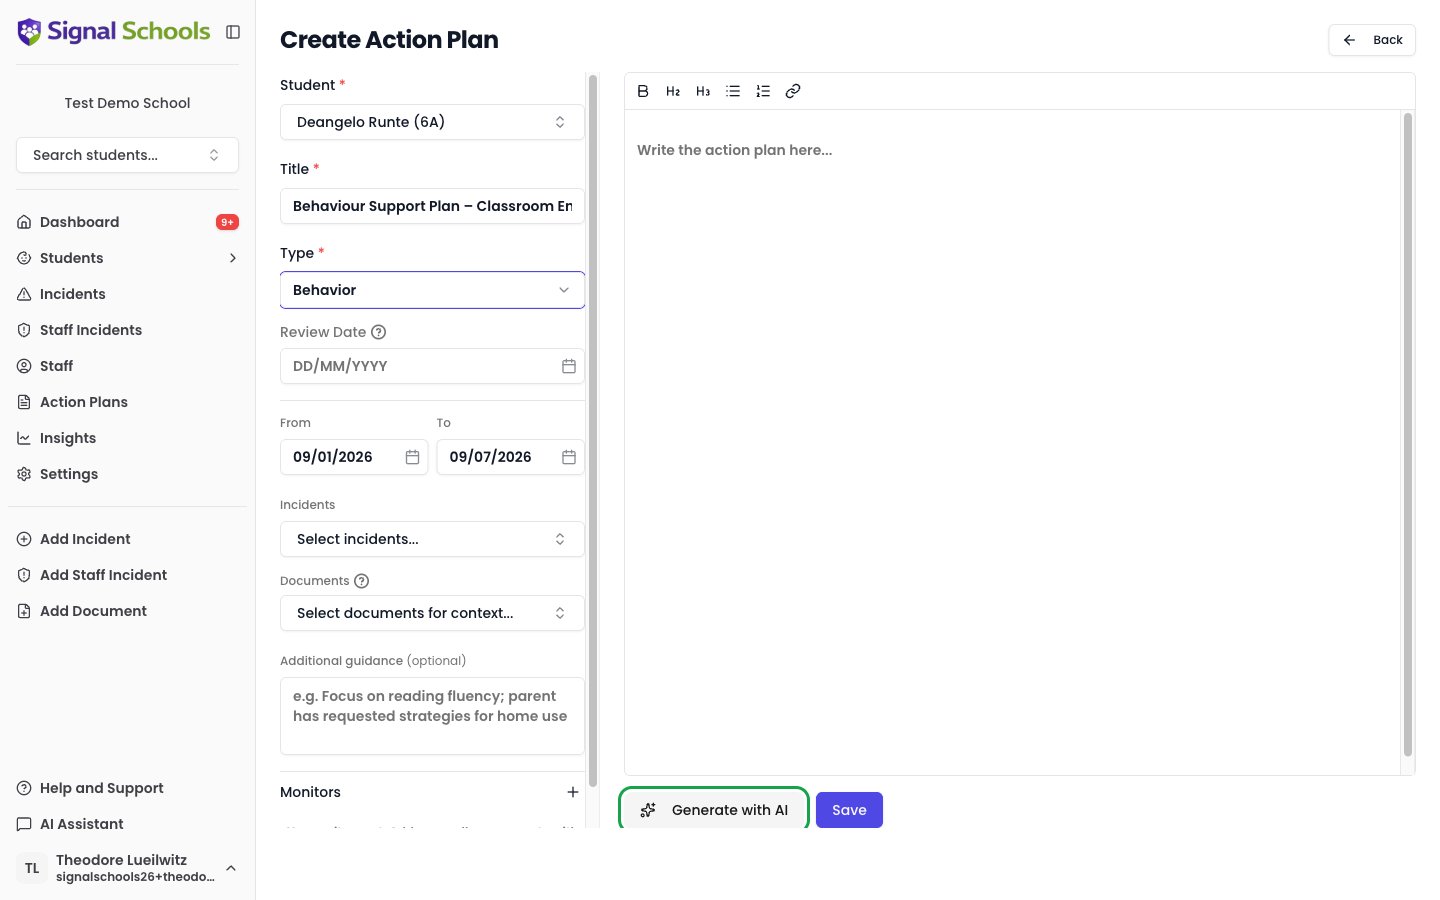
5
Link relevant incidents
Connect the student incidents that prompted or relate to this plan. Linking incidents gives reviewers the full context behind the intervention.On a joint plan you are offered only the incidents that involve every student on the plan — the incidents between them. This keeps a joint plan focused on the shared issue rather than each child’s wider history.
6
Set a review date
Use the Review Date field to choose when the plan should be reviewed. You can also assign the review to a specific staff member who will be responsible for carrying it out. Upcoming reviews appear on your dashboard under Upcoming Reviews, so you receive a reminder when the date approaches.
7
Save
Click Save to create the action plan. It is now active and visible to staff with appropriate access.
Starting a plan from an incident
You can also start a plan straight from an incident, which carries the incident’s students and context across for you. Open the incident and choose Create Plan. If the incident names more than one student, Signal asks who the plan is for with the Select Students for Action Plan dialog: “This incident names more than one student. Choose who the plan is for — pick several to write one joint plan they work through together.” Tick each child who should be on the plan and click Continue. Tick one for an ordinary single-student plan, or several for a joint plan.Adding a student to an existing plan
Open the plan, click Edit, and search for the student you want to add. Existing students appear as chips you cannot remove.Students can be added to a plan but never removed, because the plan already records work done with that child. If the grouping is wrong, complete the plan and create a new one with the right students.
AI-assisted generation
Signal can draft action plan content to save you time. The AI uses the plan type, its description, and any linked incidents to produce a structured draft that covers key areas such as objectives, strategies, and expected outcomes.AI-generated content is always a draft. You should review it carefully, adjust it to reflect the specific circumstances of the student, and add any details the AI may have missed before saving.
Managing action plans
Editing plan content
You can update the plan content at any time. Open the action plan and edit the content area to reflect changes in the intervention, new strategies, or updated objectives.Action plans are available to Contributor and above, so class teachers and pastoral staff can edit and review plans. School Admin has no access to action plans.
Linking and unlinking incidents
As new incidents are recorded or circumstances change, you can link additional incidents to the plan or remove ones that are no longer relevant. This keeps the plan connected to the current safeguarding picture.Scheduling reviews
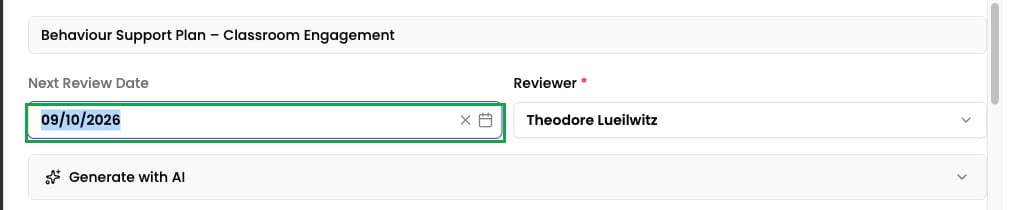
Set or update the Review Date at any time. You can assign the review to a specific staff member so the right person is responsible for completing it. When a review is due, it appears on the dashboard to prompt you to assess progress. When you assign a review to a colleague, they receive an email letting them know the review is theirs, along with the date it is due and a link to open the plan. They are emailed when you first assign them and again if you later hand the review to someone else.You will not be emailed for reviews you assign to yourself, and editing a plan without changing the reviewer does not send another email.
Conducting a review
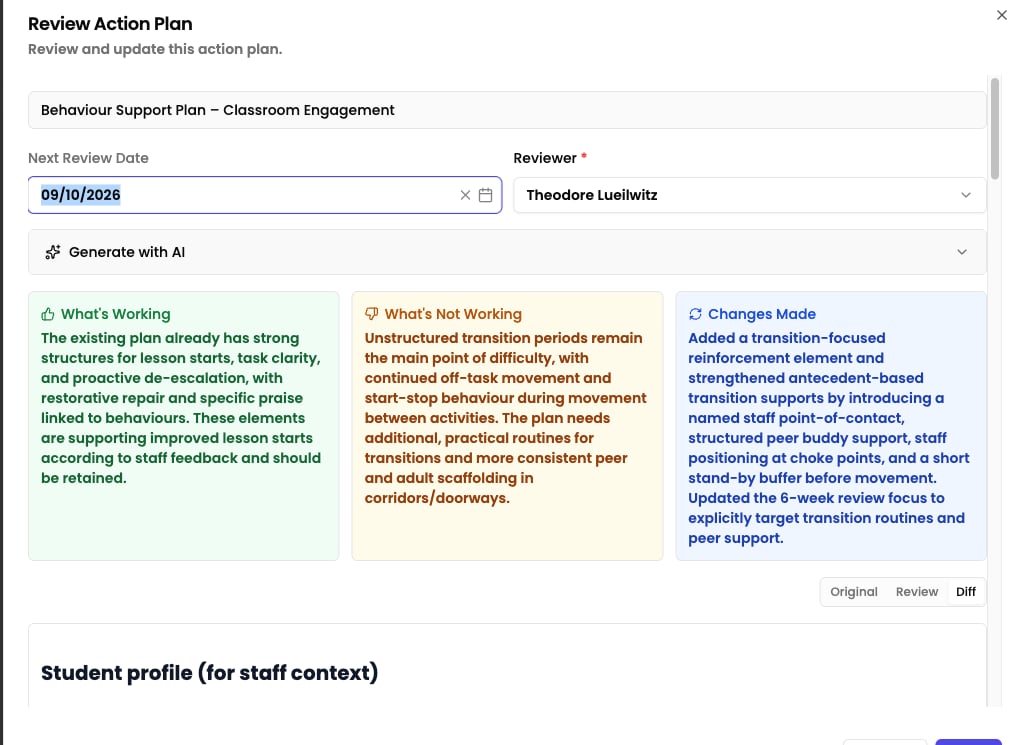
When it is time to review a plan, open it and click Review. You can select which recent incidents to include as context, then either write your update manually or use AI to generate a suggested revision. AI-assisted reviews: Signal’s AI analyses the current plan content, recent incidents, and monitor data (including check-in trends and staff notes) to suggest updates. The AI identifies which strategies are working, which are not, and produces a revised plan. When AI generates a review, you see:- Change summary — three panels showing what’s working well, what’s not working, and what changes were made. This gives you a quick overview of the AI’s reasoning before you look at the detail.
- Three view modes — switch between Original (the current plan as-is), Review (the AI’s suggested revision, which you can edit), and Diff (a side-by-side comparison highlighting exactly what was added or removed). This makes it easy to see precisely what the AI changed.
Review history
Every review is saved in the plan’s review history, creating an auditable record of decisions, changes, and assessments over time. You can see who reviewed the plan, when, and what content was saved.