
You need the Contributor role or above to record events.
Recording an event on an existing incident
1
Open the incident
Open the incident you want to add the event to.
2
Choose Record Event
Open the incident’s More actions menu (the ⋮ button) and choose Record Event.
3
Choose the event type
In the Event Type field, select an event type — for example, Suspension or Police. Types are grouped to make them easy to find, so you can search by grouping too. If your school has not set up the type you need, an administrator can add it.
4
Choose the children it applies to
If the incident involves more than one child, tick the ones this event applies to under Children this applies to. Everyone starts ticked, so untick anyone it does not apply to.
5
Set the dates
Choose a Start Date — it defaults to today. If the event spans a period (such as a fixed-term exclusion), also set an End Date. Events with an end date show both a start and an end marker on the timeline.
6
Add notes and details
Optionally add Notes.
7
Save
Click Record Event. The event appears immediately on the incident timeline.
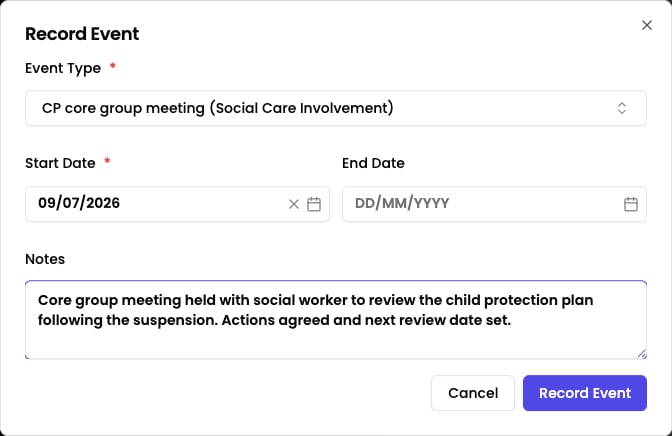
Adding events while creating an incident
When you record a new incident you can add events at the same time. After the AI analyses your description, an Events section appears in the review step — click Add Event to add one. If the AI suggests events based on your description, they are pre-filled for you to review — you can keep, edit, or remove them before saving.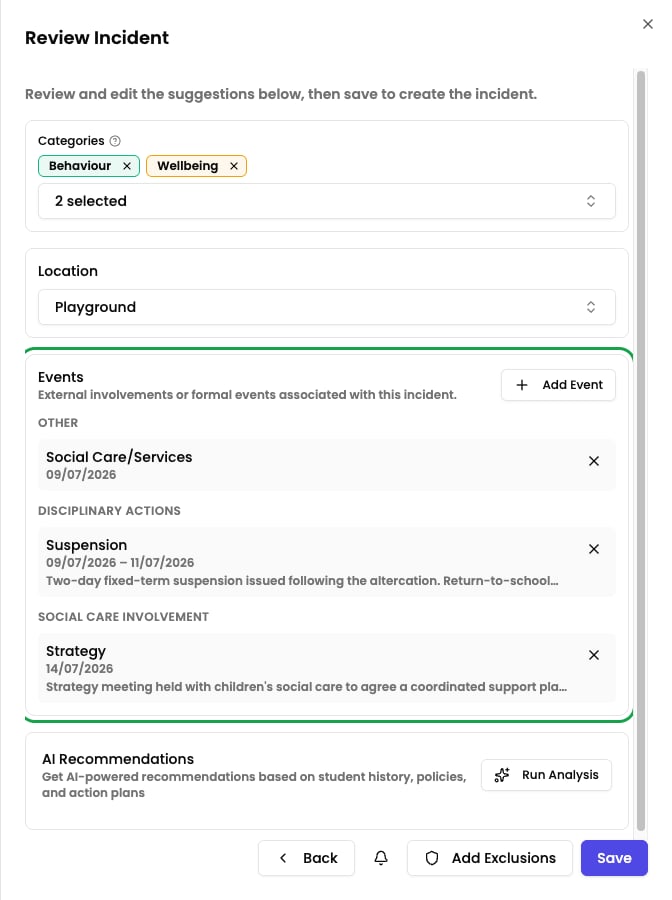
Incidents involving more than one child
When an incident involves more than one child, the Add Event and Edit Event dialogs show a Children this applies to list. Every child on the incident starts ticked — untick anyone the event does not apply to.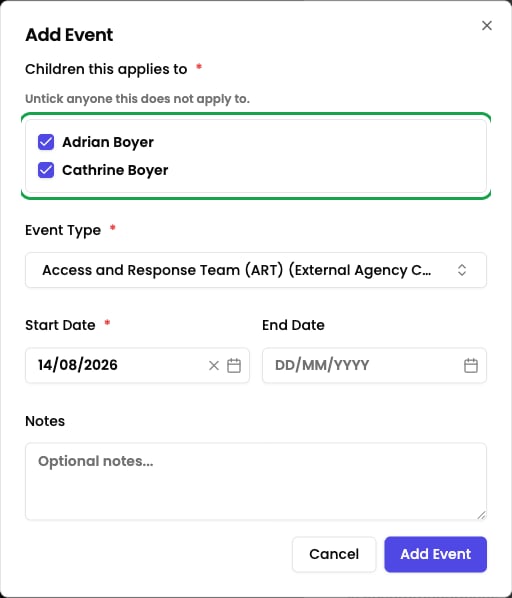
- A shared type (a referral, a meeting) saves one event naming everyone you ticked. One referral made for two siblings is one referral.
- A per-child type (a suspension) saves a separate event for each child you ticked, so each can carry its own dates and be edited on its own. The dialog tells you how many records it will create.
To keep things accurate, events are not suggested automatically when an incident has several main students — add them manually and choose the children each one applies to.
Editing an event
Find the event and choose Edit to open the Edit Event dialog. You can change the dates, the notes, and — on an incident involving more than one child — which children the event applies to. This is how you remove a child who was included by mistake. The event type is fixed once the event is created. Click Update Event to save.You can edit or delete an event you created. Staff with the DSL, Deputy DSL, or Owner role can edit or delete any event.