The six stages at a glance
1
Try the demo
Explore a fully working version of Signal with sample data. No commitment.
2
Subscribe
Switch on your live school account. Demo data is cleared out.
3
Connect your MIS
Students, staff, classes, and attendance flow in automatically.
4
Import your previous records
Bring your existing safeguarding history across from your old system.
5
Get a tailored review
We analyse how your school actually records concerns and recommend how Signal should be configured for you.
6
Migrate and tidy your data
We apply the agreed configuration and clean up your imported records to match it.
Stage 1: Try the demo
Every school starts with a demo. You get a complete, working copy of Signal loaded with realistic sample students, staff, incidents, and attendance, so you can judge it properly rather than watching a sales walkthrough. Use this stage to test the things that matter to you: record a concern, try the AI assistant, look at Insights, and invite colleagues in to give their view. See Demo & Subscriptions for what the demo includes and how to explore it.The Integrations area is switched off during the demo. Everything else is available.
Stage 2: Subscribe
When you are satisfied Signal is right for your school, an Owner subscribes from Settings. Subscribing clears out all the demo students, staff, and incidents so you begin your live account with a clean slate. Your school’s configuration — categories, locations, events, staff accounts, and workflows — is kept.Stage 3: Connect your MIS
With your subscription active, connect Signal to your management information system. Signal supports Arbor, Bromcom, and Wonde. This is what populates your live account with real people: students, staff, year groups, classes, and attendance, all kept up to date automatically from then on. You never maintain a student list by hand. See MIS Integration for what each provider needs and how long the first sync takes.Connecting an MIS requires the Owner, DSL, or Deputy DSL role.
Stage 4: Import your previous records
Your safeguarding history matters, and starting from an empty system is not acceptable. Once your MIS is connected, Signal can import the records from your previous safeguarding system so that a student’s history follows them. What is imported:- Historic incidents, with their original dates and descriptions
- The categories and tags your old system recorded against them
- Attached documents and files, where your previous system provides them
Stage 5: Get a tailored review
This is the stage schools find most valuable, and it is the one most often skipped elsewhere. Every school records concerns differently. Your previous system’s categories will have grown organically over years — some used constantly, some used twice in 2019, some meaning the same thing under two names. Copying that muddle into Signal would simply carry the mess forward. So once your records are imported, the Signal team analyses how your school actually recorded concerns and produces a written recommendation covering:- Categories — which concern types you genuinely use, which to merge, and which to retire
- Locations — the places your records show incidents actually happen
- Events — the follow-up actions and external involvements you record most
- Custom fields — the extra details your school captures that deserve their own field, so they become reportable rather than buried in free text
- Category rules — where a particular concern type should always require more detail
This review is grounded in your real imported data, not a generic template. If your previous system shows that 60% of your records were logged under one catch-all category, we will tell you, and recommend what to do about it.
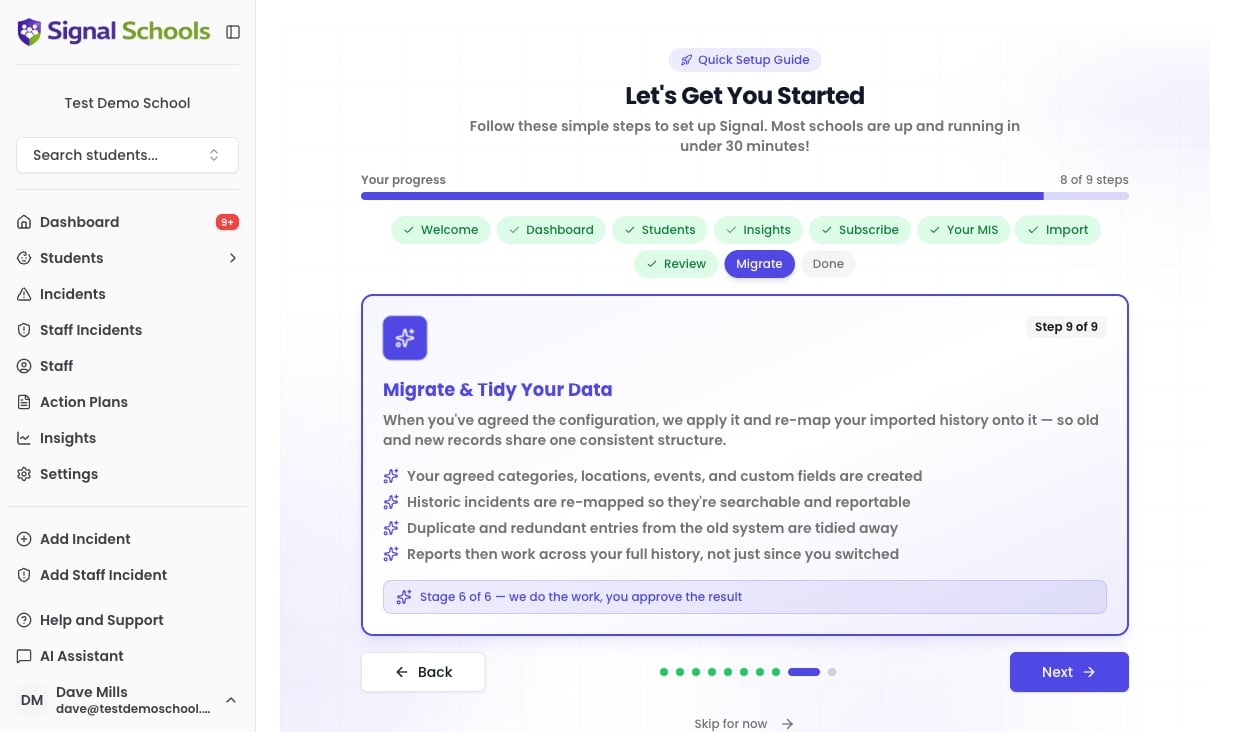
Stage 6: Migrate and tidy your data
Once you have agreed the configuration, the Signal team applies it for you:- Your agreed categories, locations, events, and custom fields are created
- Your imported historic incidents are re-mapped onto the new structure, so old records become searchable and reportable in the same terms as new ones
- Duplicate and redundant entries from the old system are tidied away
You can keep using your old system while you switch. Once your configuration is migrated, any later import is translated into your new structure automatically, so records created in the meantime arrive correctly categorised rather than blank.
Your go-live checklist
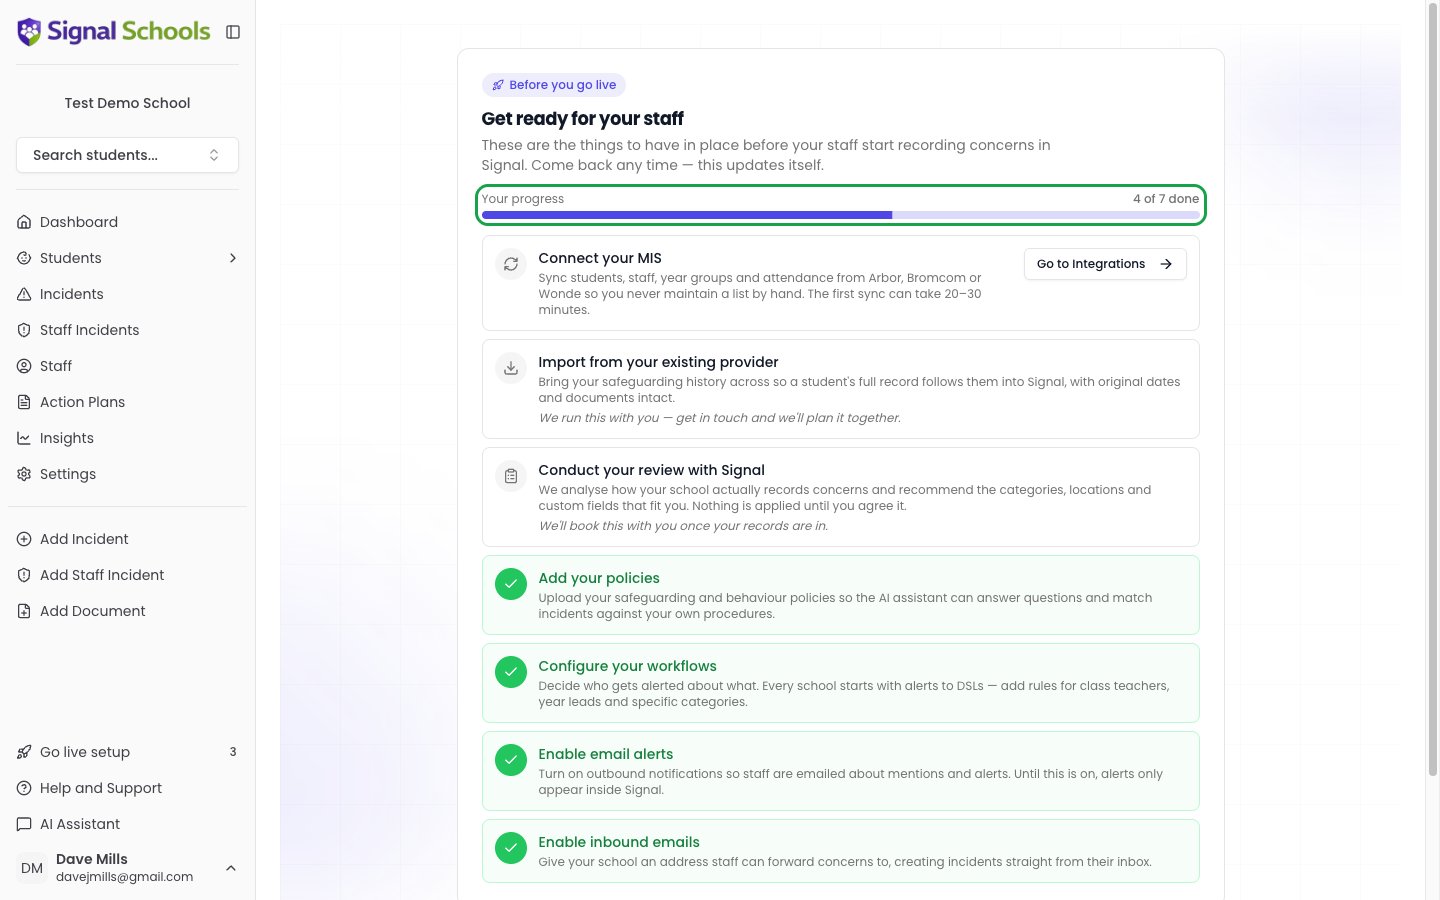
Once you subscribe, the Go live setup page adds a checklist of everything that needs to be in place before your staff start recording concerns in Signal.The go-live checklist is only shown to Owners, and only once your school has subscribed. During the demo you see the guided tour on its own.
Items you can action yourself have a button taking you straight to the right page. The two the Signal team runs for you — your records import and your tailored review — are marked accordingly, and we complete them with you.