
Where documents live
Documents appear in three places across Signal, each serving a different purpose.Student document library
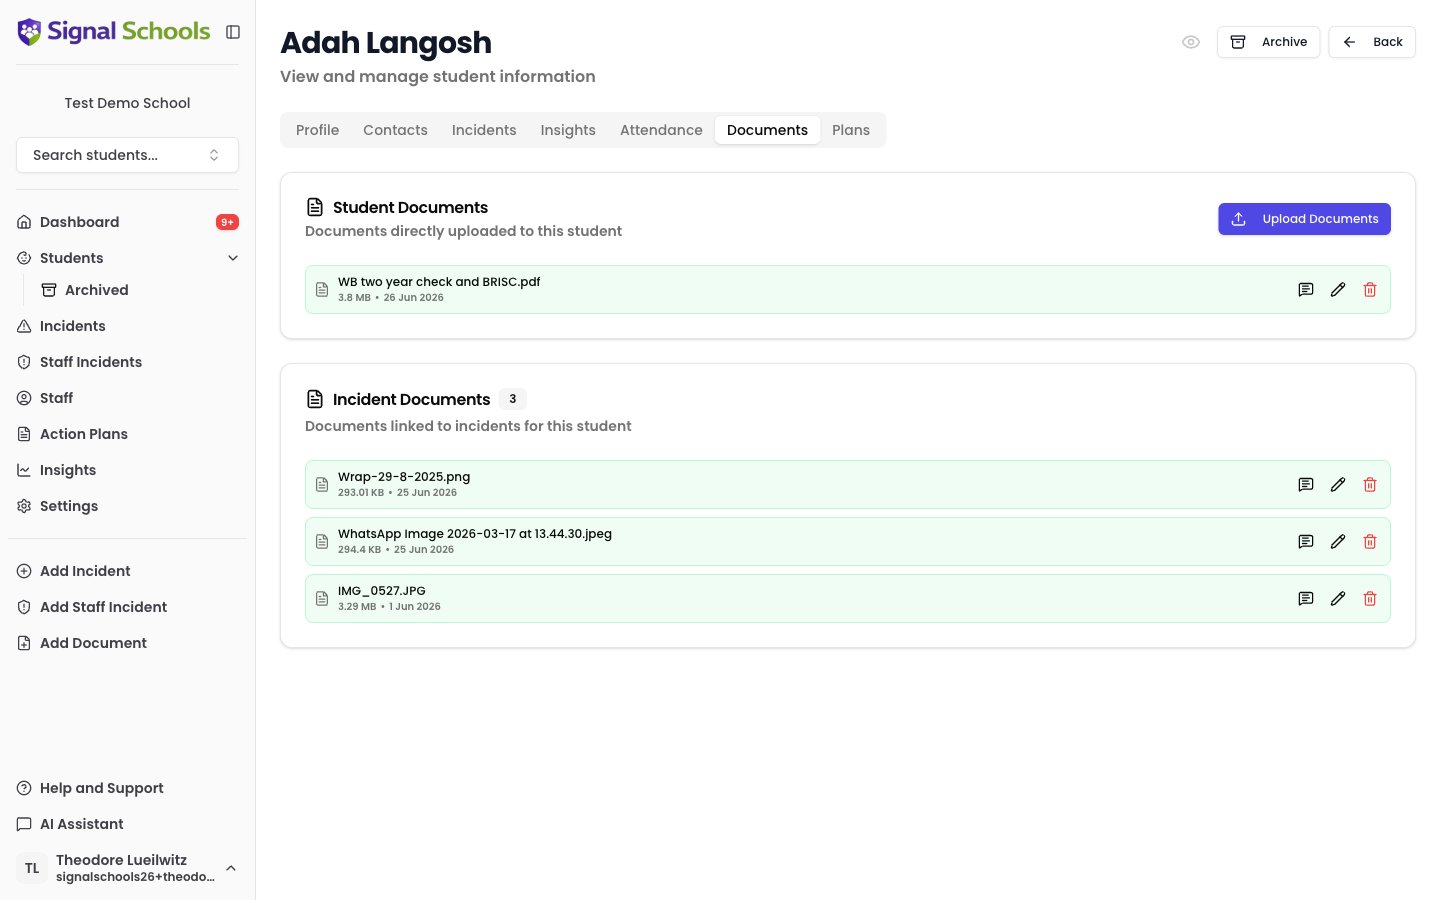
Every student profile includes a dedicated document library. You can upload files here that relate to the student but are not tied to a specific incident — school reports, medical letters, assessment results, court orders, or photos. The document library gives you a single place to find everything about a student, without having to search through email or shared drives.Incident attachments
When you record an incident, you can attach files as supporting evidence. Common attachments include photographs of injuries, screenshots of online activity, scanned letters from parents, or notes from meetings. Incident attachments are stored with the incident record and are visible to anyone who has access to that incident.Transfer documents
When you transfer a student’s records to another school, you can include documents from their library and their incident attachments. This ensures the receiving school has the full picture.Supported file formats
Signal accepts a wide range of file formats, up to a maximum file size of 55 MB per file:- PDF documents
- Images — JPEG, PNG, and other common image formats
- Office documents — Word, Excel, and PowerPoint files
Uploading documents
There are two ways to add documents to a student’s library. Use the Documents tab on a student’s profile when everything you are uploading belongs to that one child, or the Add Document shortcut in the sidebar when you have a batch of files for several different children.From a student’s profile
1
Open the student's profile
Navigate to the student and select the Documents tab.
2
Upload your files
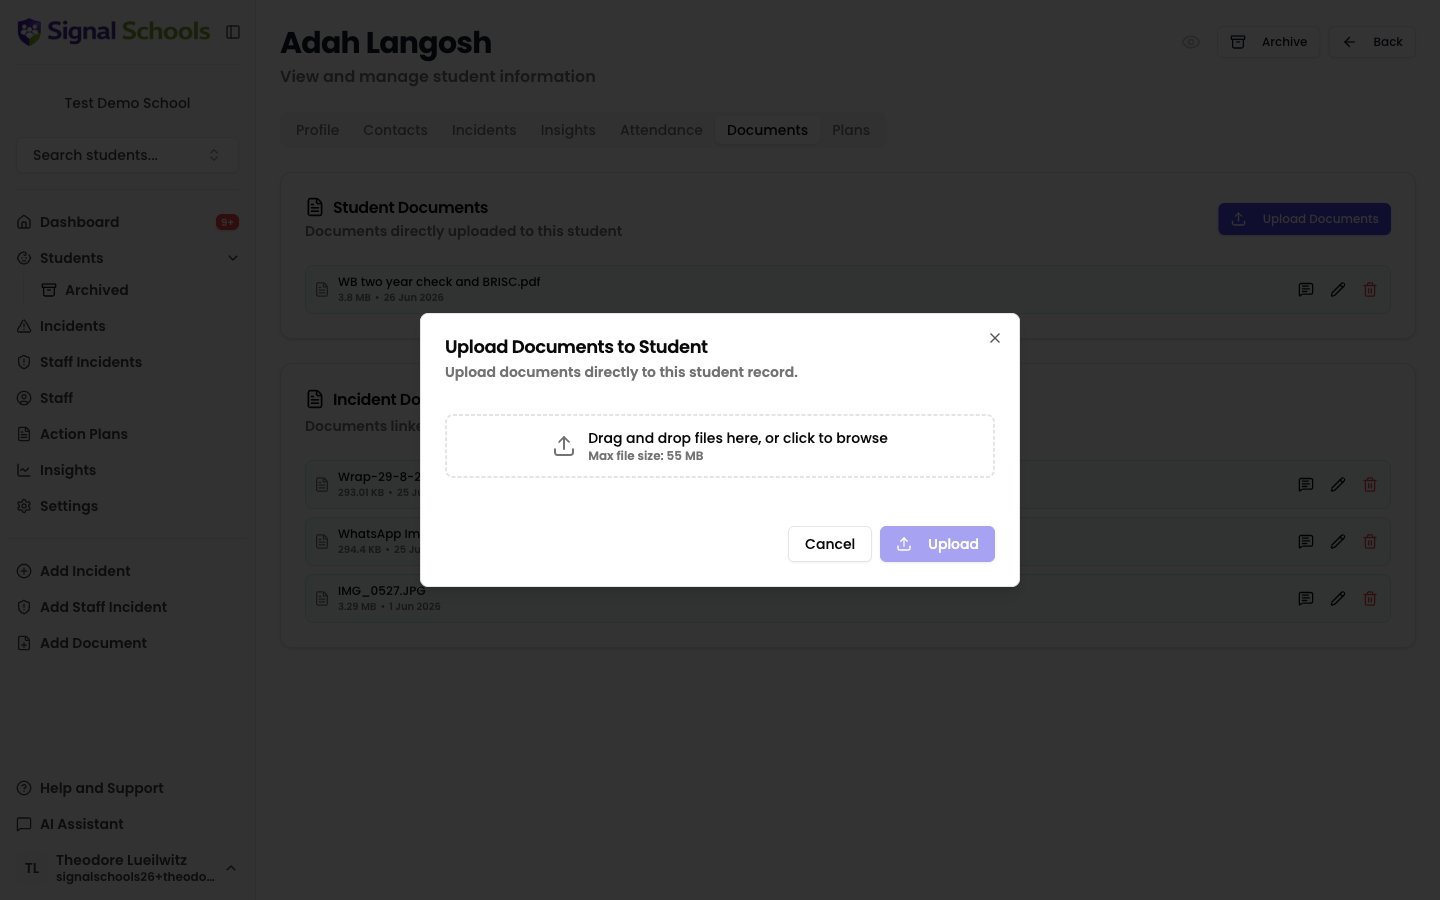
Click Upload and select one or more files from your device. You can upload multiple files at once.
3
Review uploaded documents
Your files appear in the document library with the upload date and file type. You can open, download, or remove them at any time.
From the sidebar (multiple students at once)
The Add Document shortcut at the bottom of the sidebar lets you upload a batch of files from anywhere in Signal and send each one to a different student. This is the quickest way to clear a folder of scanned letters, reports, or assessments that cover several children.1
Open the Add Document shortcut
Click Add Document in the sidebar. The Add Student Documents dialog opens.
2
Select your files
Drag your files onto the upload area, or click it to browse your device. Select as many files as you need — you can come back and add more before uploading.
3
Assign a student to each document
Every file appears as its own row with its name and size. Use the student search beside each row to choose which child that document belongs to. Different files can go to different students.
4
Remove anything you did not mean to include
Click the ✕ beside a row to drop that file from the batch. The students you have already assigned to the other files are kept.
5
Upload
Click Upload. The button shows how many documents will be sent. Each file is saved to its assigned student’s document library.
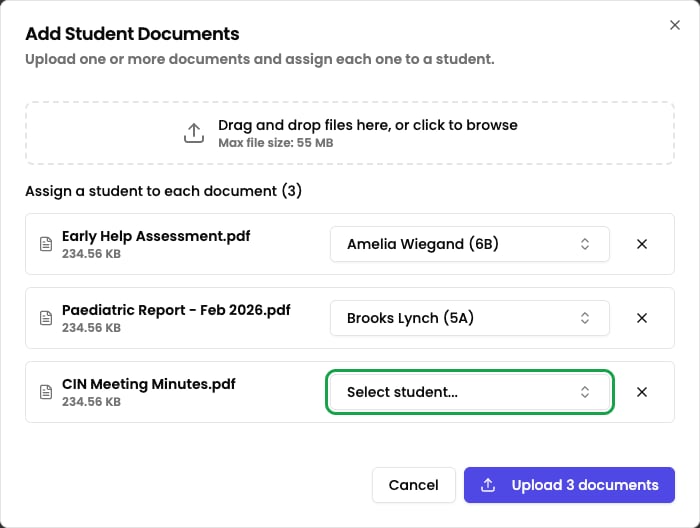
Every document needs a student before you can upload. If any row is still unassigned when you click Upload, Signal highlights those rows with Select a student for this document and nothing is sent until you fill them in.
If you select the same file twice, Signal keeps one copy and tells you that duplicate files were skipped.
Viewing and managing documents
You can open any document directly in Signal to view its contents. PDF files and images display inline, so you do not need to download them first. To remove a document, open it and select the delete option. Deleted documents are permanently removed.Deleting a document from a student’s library requires Deputy DSL or above. Contributors can upload documents and read their summaries, and can remove a file they attached to an incident they recorded — but not from anyone else’s incident or from the student’s library. Ask a member of the safeguarding team if something else needs removing.
AI document analysis
Signal’s AI can automatically analyse uploaded documents — extracting text, generating summaries, and highlighting key information. This is especially useful for scanned documents or lengthy reports.Document Analysis
Learn how AI reads and summarises your uploaded documents.